

How To Make Iron On Patches With Cricut
This post and photos may incorporate Amazon or other chapter links. If you purchase something through whatever link, I may receive a small committee at no extra charge to you lot. Any supplies used may be given to me free of charge, however, all projects and opinions are my own.
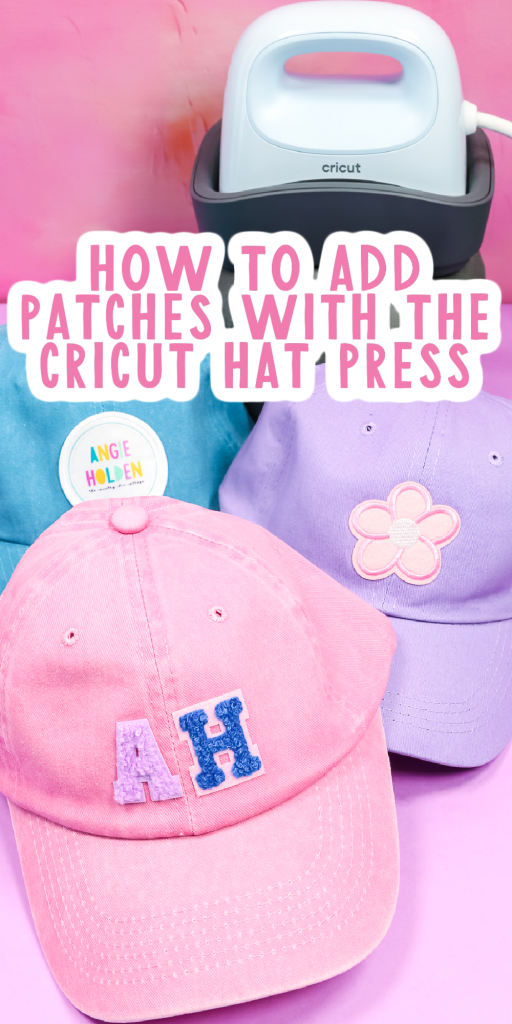
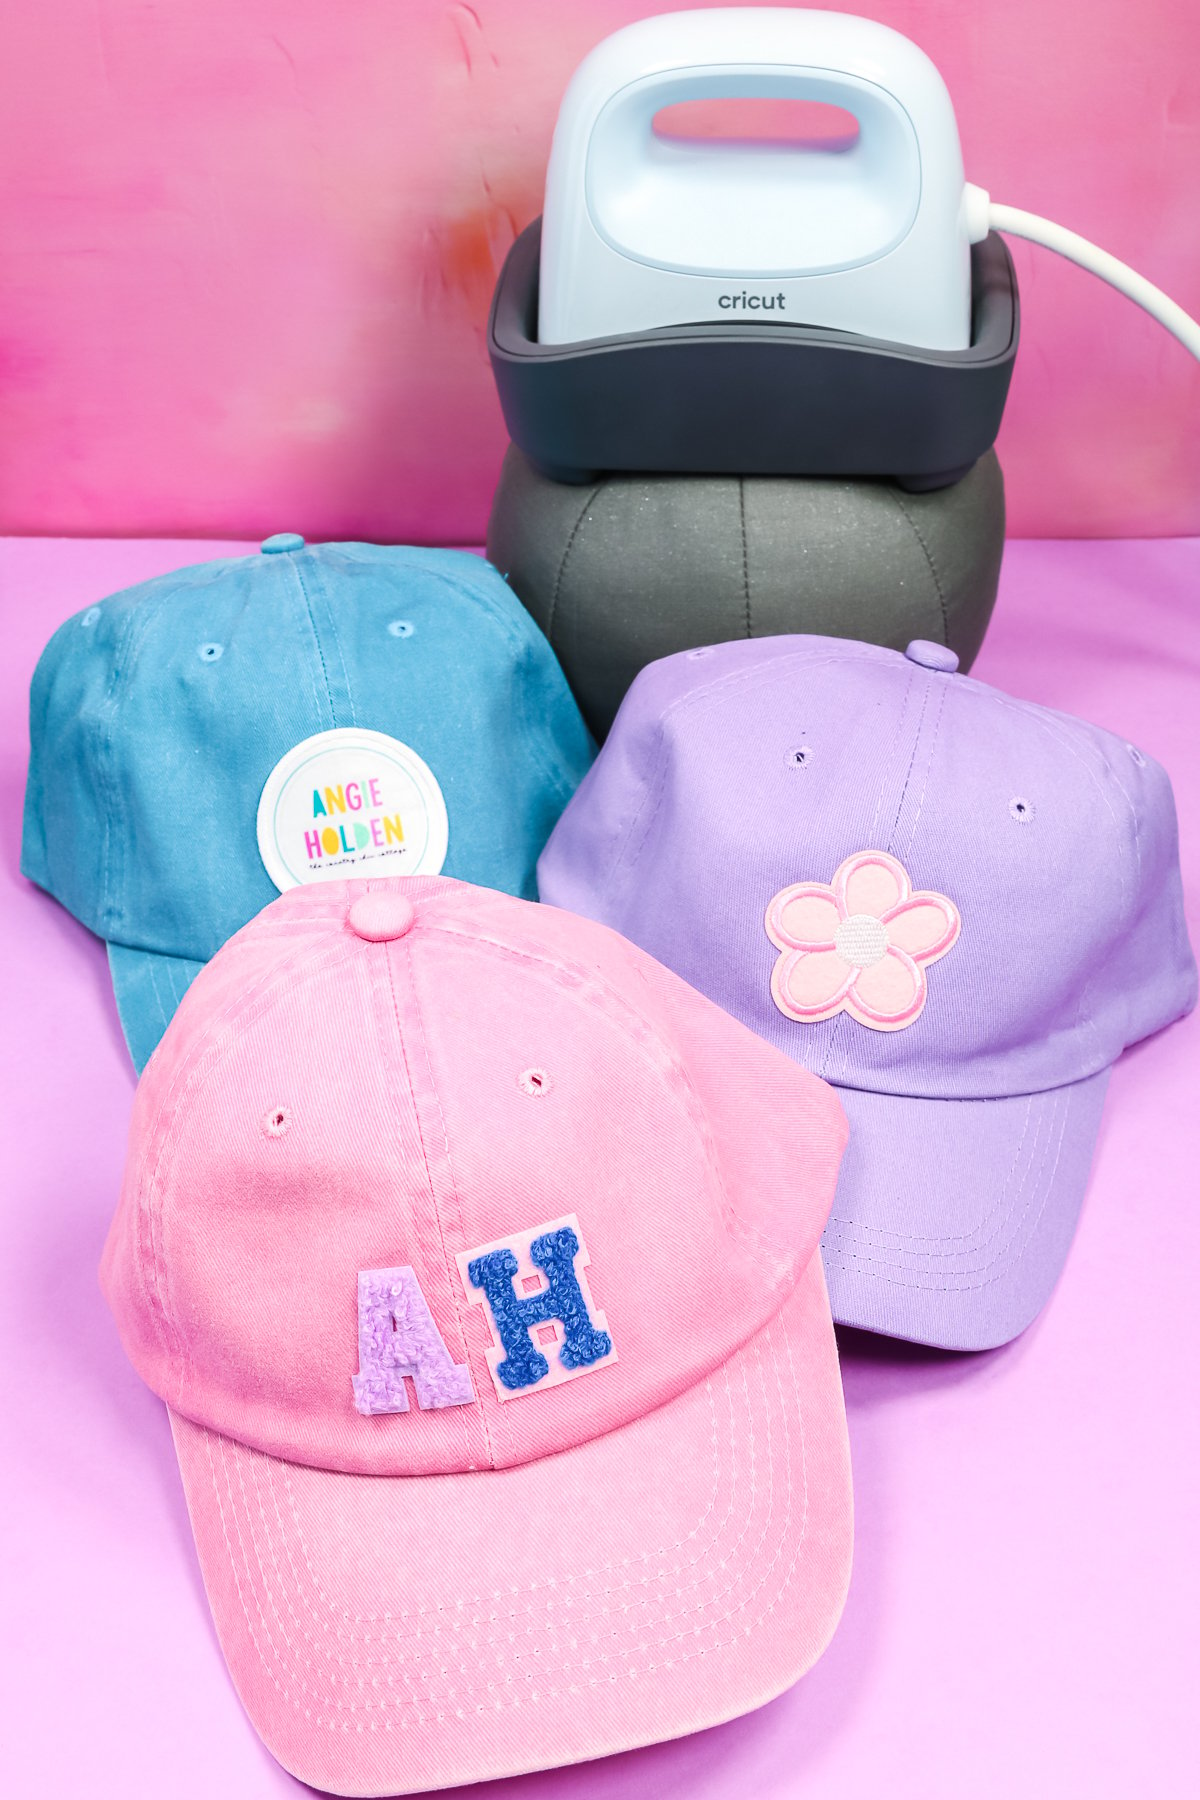
What near adding patches with the Cricut Hat Printing? When the new Hat Printing from Cricut came out, I was asked over and over if you could use it to add patches to hats. Patches are a huge trend right now so I couldn't wait to attempt them out. I'm testing regular iron-on patches and sublimation patches. Keep reading to find out how they turned out!
Looking for my post all nigh customizing hats with the Cricut Hat Press? You tin find it here.
Adding Patches with the Cricut Lid Press
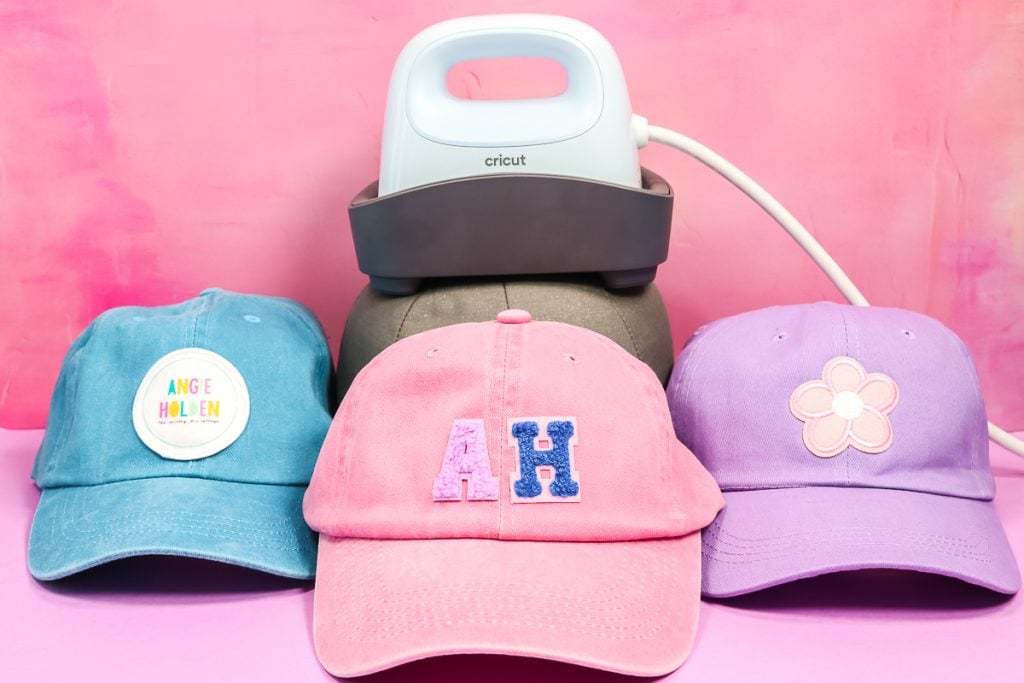
I knew when I started thinking almost this project I wanted to try a multifariousness of patches. The slap-up thing well-nigh all of these hat options is you don't demand a Cricut machine to make any of them. I knew I had to test out the chenille varsity letter patches that are everywhere. They're so fun and at that place are a lot of color and style options.
I also wanted to exam the standard iron-on patch you tin discover at well-nigh any craft store. Last, I really wanted to test sublimation patches. These are a great option for creating logo hats (similar I did) or actually getting specific with the image you want to add together to your hat. You can watch me test out adding patches with Cricut Chapeau Printing in the video below, just printing play!
Supplies Used
Some of the supplies used are only needed if you're making sublimation patches, so don't let the supply list scare you.
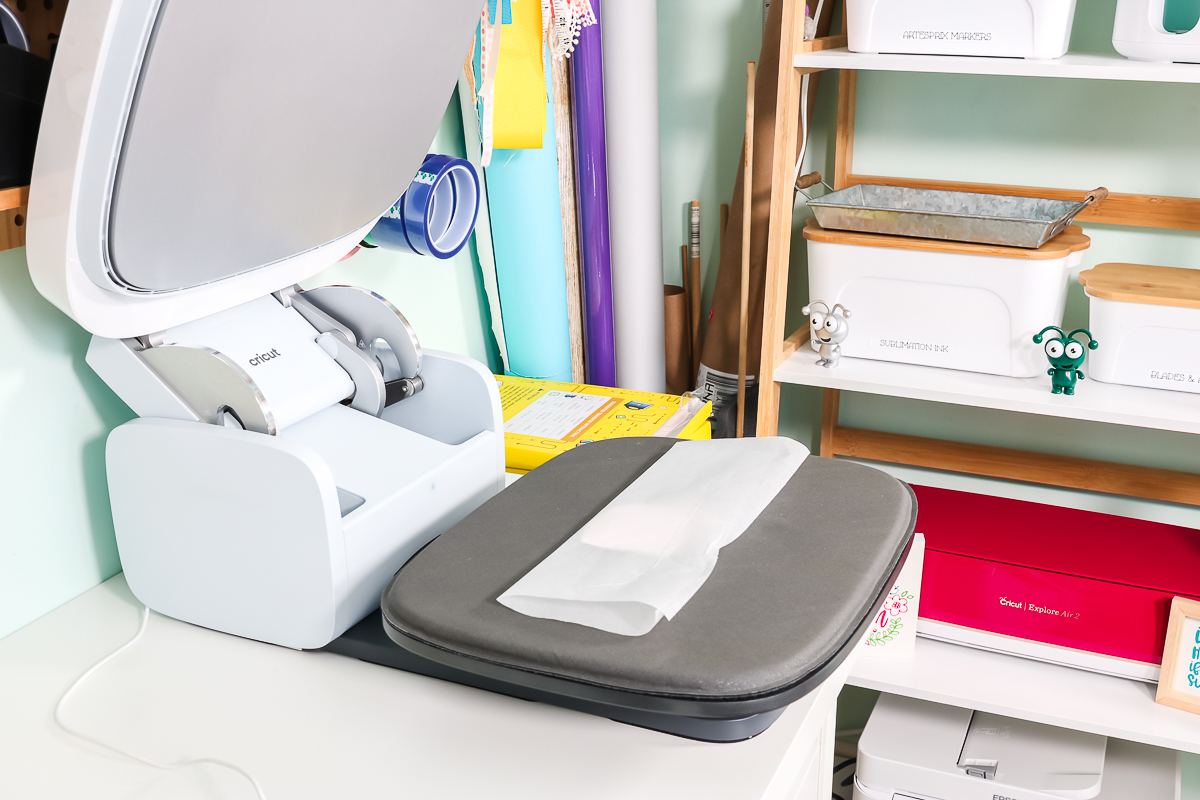
- Cricut Hat Press
- Cotton fiber Hats
- Sublimation patches
- Regular Iron-on patches
- Varsity letter patches
- Sublimation printer (for sublimation patch)
- Strong heat tape (for sublimation patch)
- Sublimation ink (for sublimation patch)
- Sublimation paper (for sublimation patch)
- Cricut AutoPress (or any other heat press for sublimation patch)
- Lint Roller
- Oestrus Resistant Tape
- Artesprix Protective Paper Use code CCC10 for 10% off! (for sublimation patch)
- Heat Resistant Mat Use lawmaking CCC10 for 10% off! (for sublimation patch)
- Heat resistant gloves (for sublimation patch)
Adding Iron-on Patches with the Cricut Hat Printing
Both the chenille varsity letter patches and the flower embroidered patch are your bones fe-on patch. You tin can easily find a wide variety of these patches at your local arts and crafts store, Amazon, and fifty-fifty Etsy has a lot of specific themed options.
For all of these hat options, you're going to follow the steps for calculation the hat form and using the Cricut Heat app to find the time and temp that I encompass in my Cricut Chapeau Press mail service hither.
Chenille Varsity Letter Patches
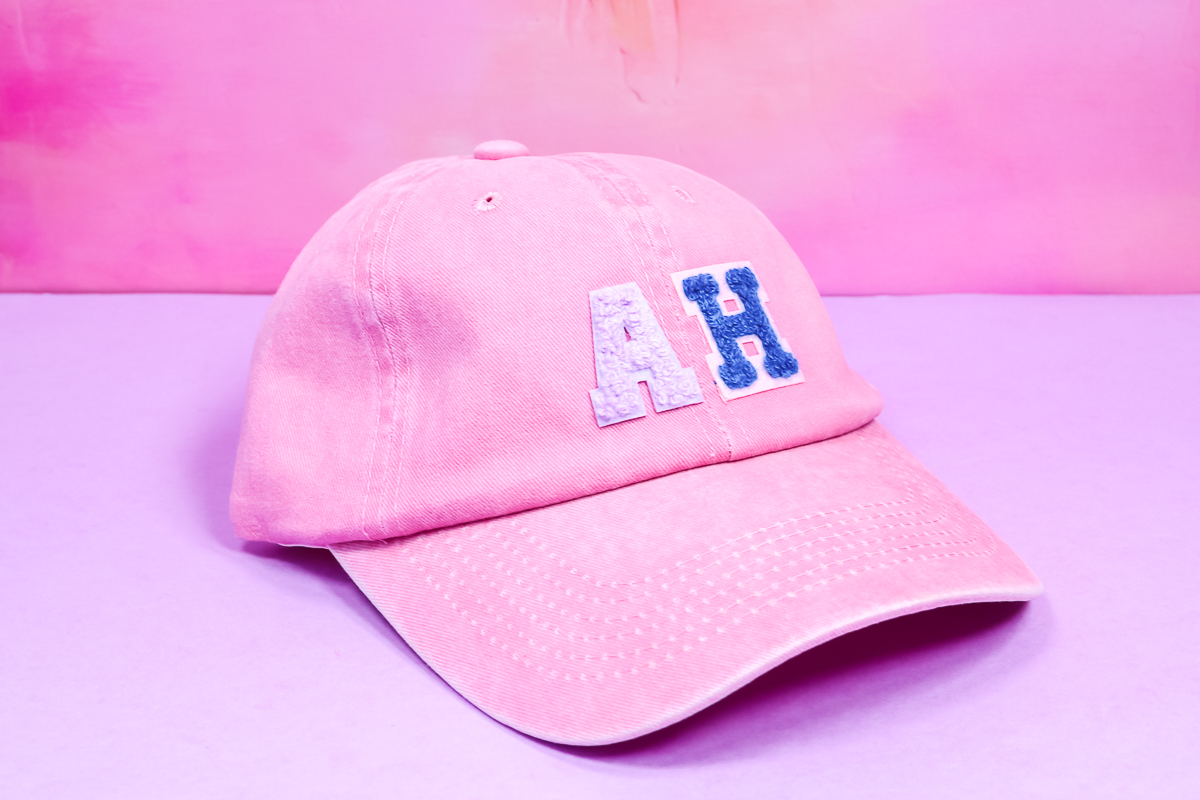
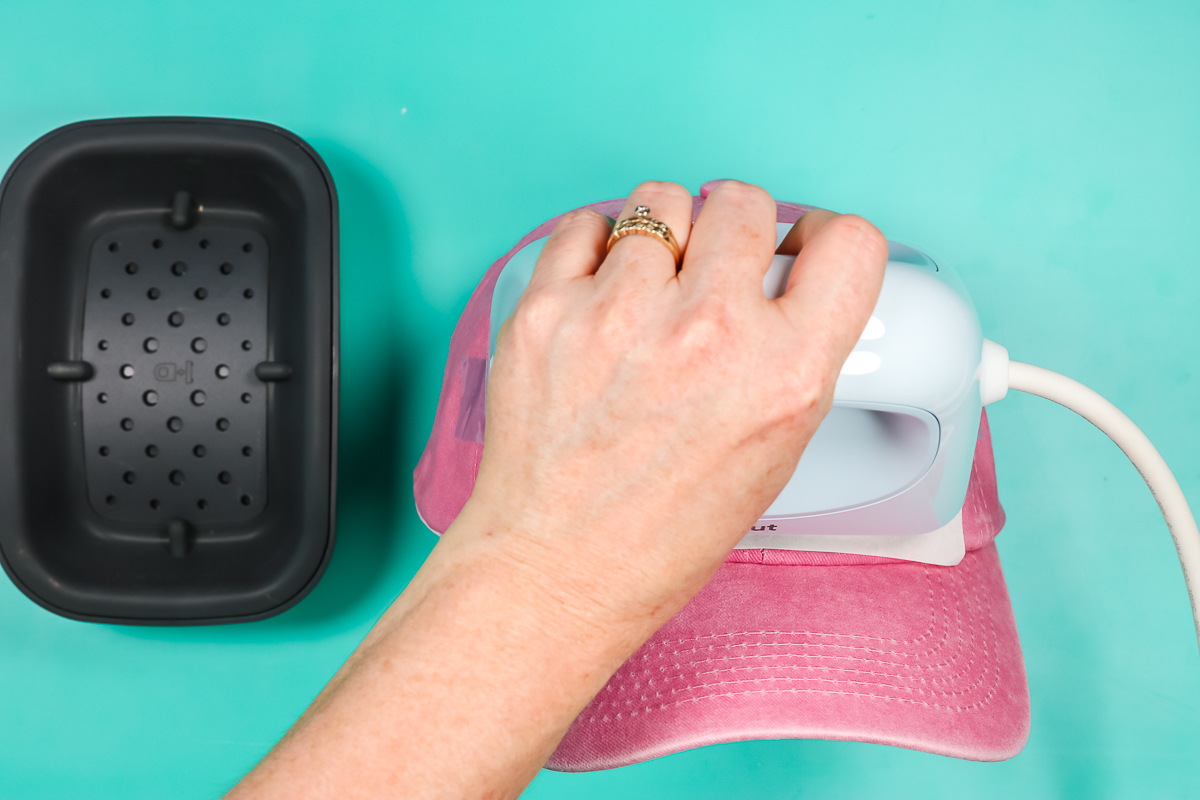
To add chenille varsity letter patches to your hat you're going to insert the hat grade into the hat and then add custom settings in the Cricut Oestrus app. For my patches, I am using 300 degrees for 60 seconds.
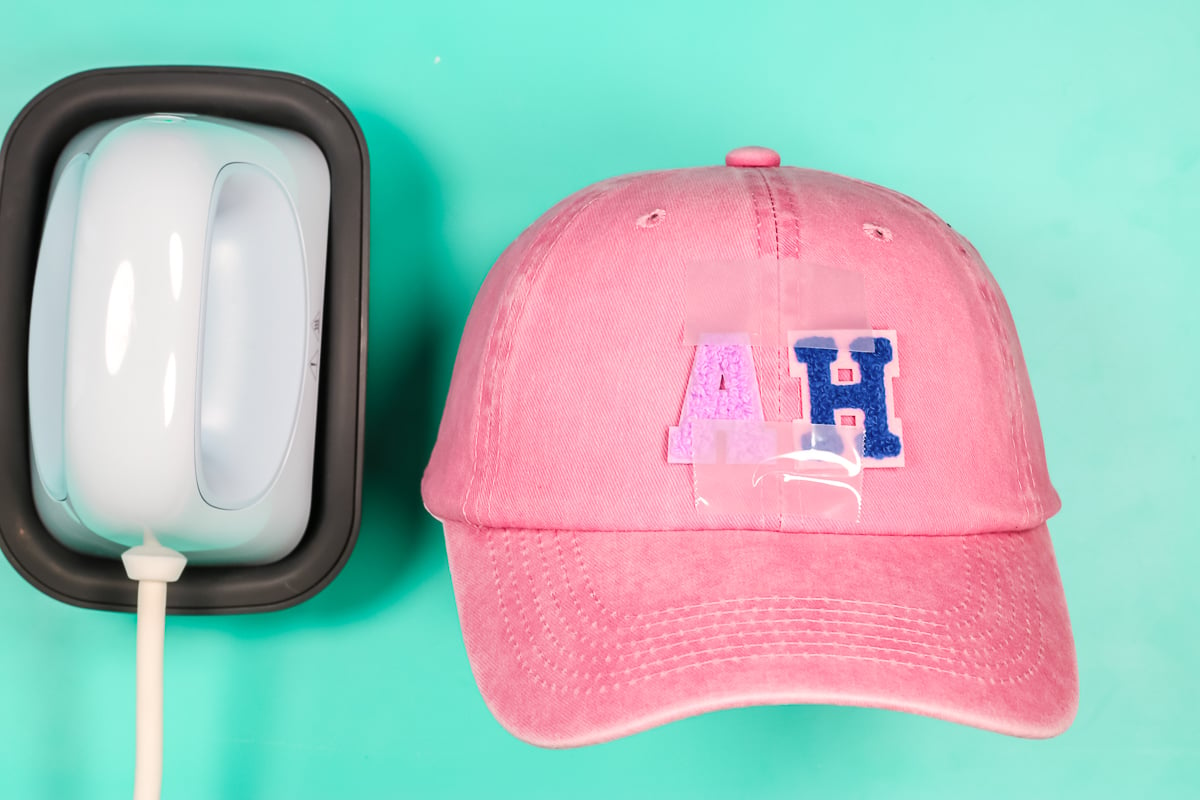
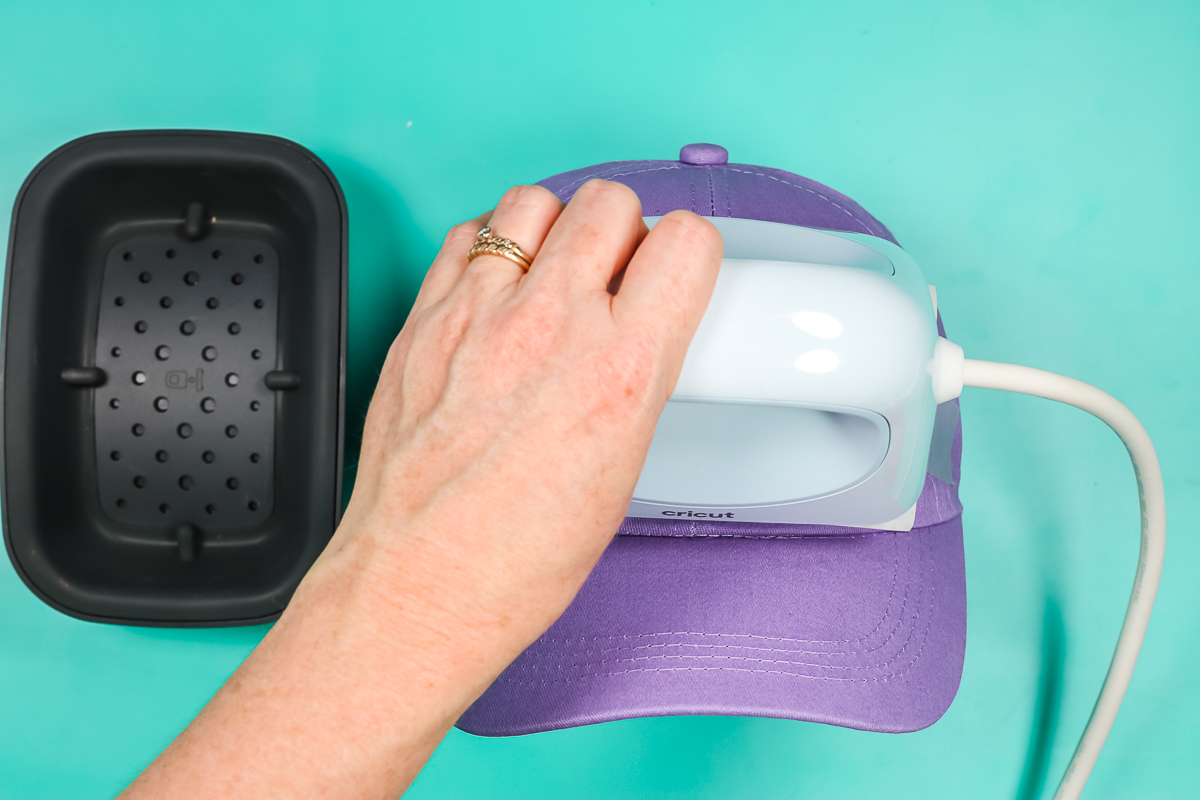
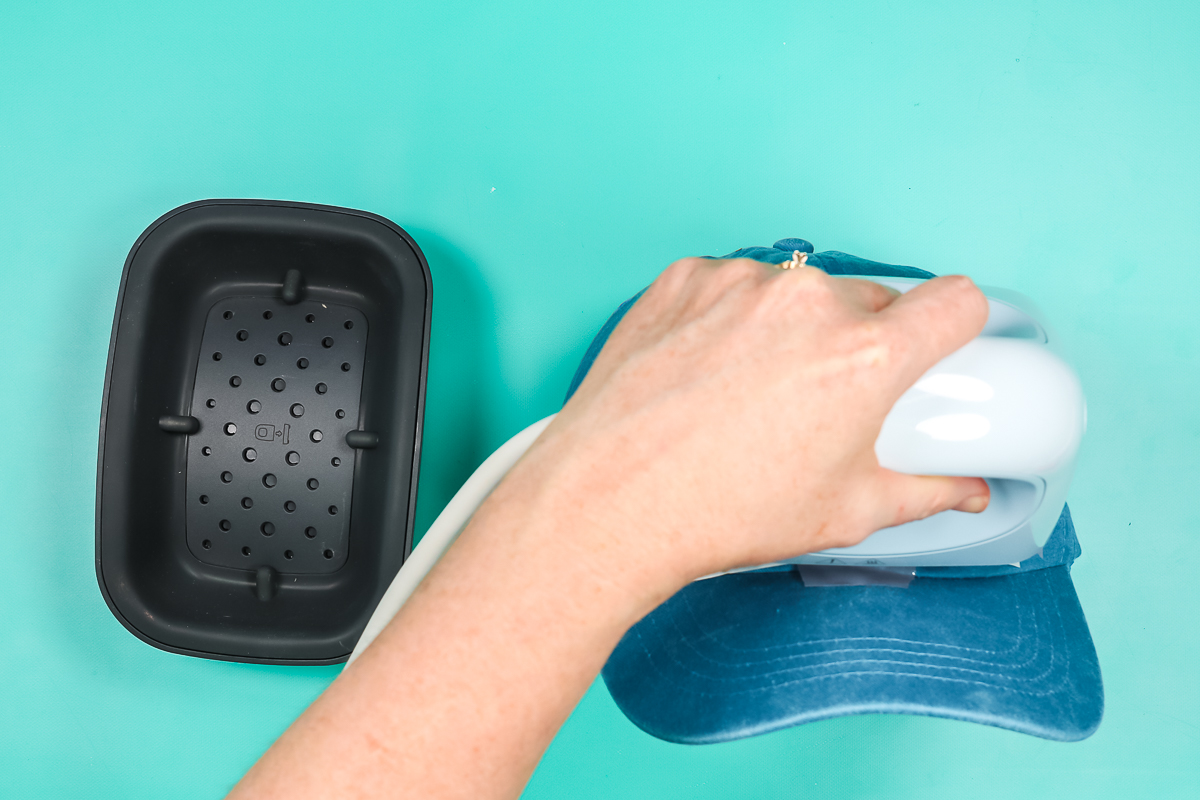
I am going to lay the patches out where I want them on my hat then, using Cricut Heat Tape, tape them in place. I recommend lint rolling your hat to make certain there are no hairs or lint between your patch and the hat. My patches recommend using something to protect the patch from the rut printing. I am using butcher newspaper taped over the top to protect the patches.
Now that everything is where I desire it I will utilise heat with the Lid Press with medium pressure moving the Hat Press back and along the whole fourth dimension.
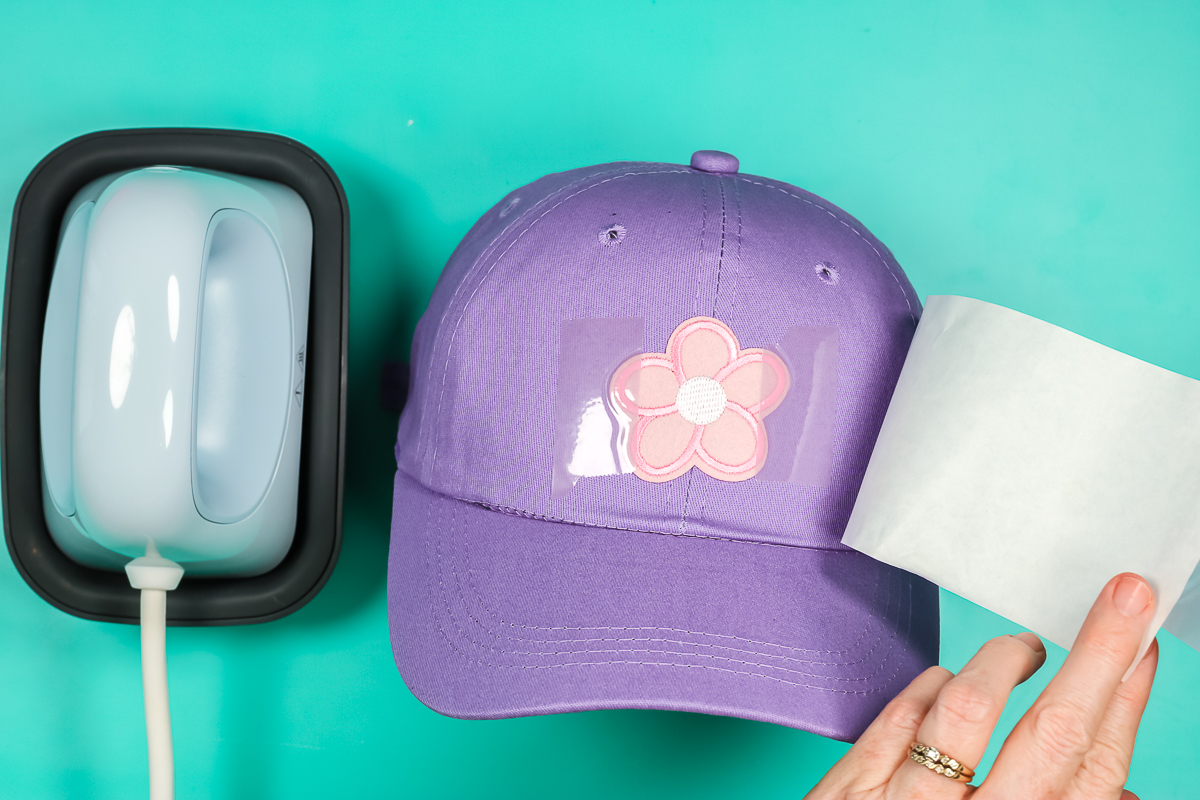
Once the Hat Printing beeps letting me know the time is up, I volition remove the Hat Press and the butcher paper making sure information technology looks like the patches are stuck downwards well. Allow the patches to cool completely before removing the heat tape from them. You lot desire to allow the iron-on adhesive to completely attach to the hat earlier really touching it.
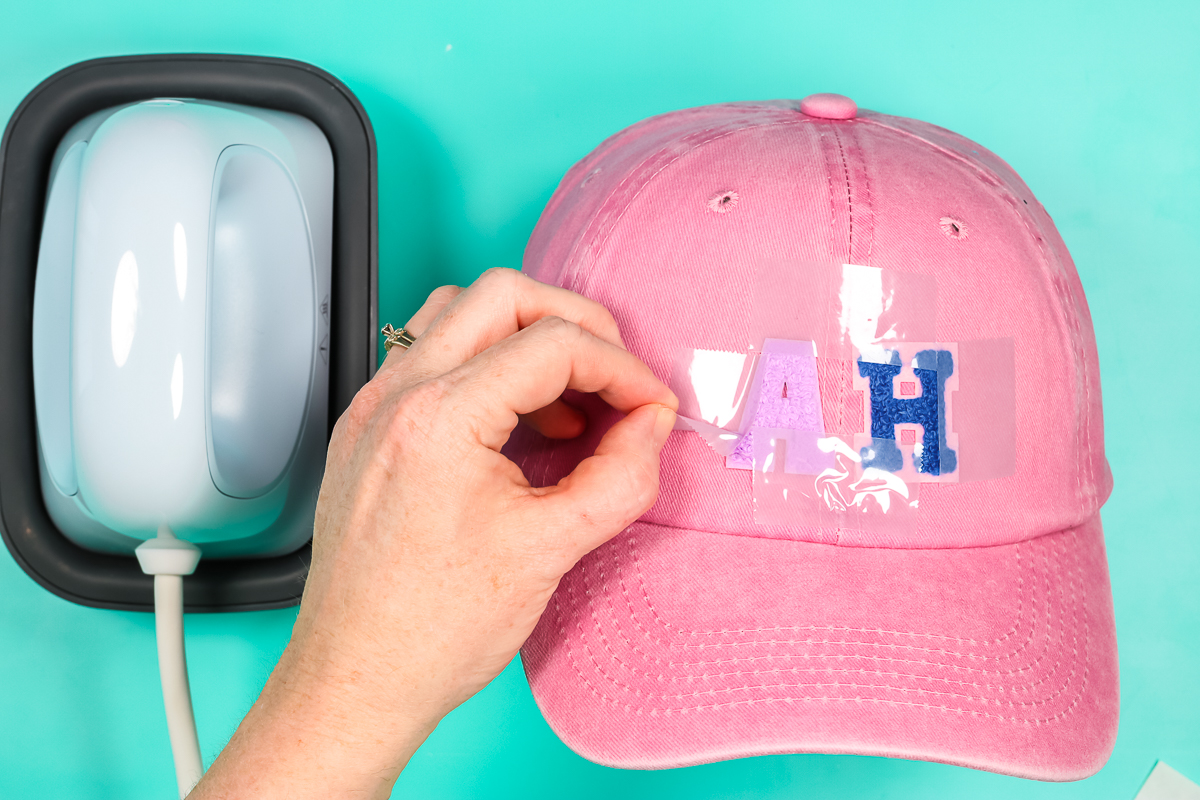
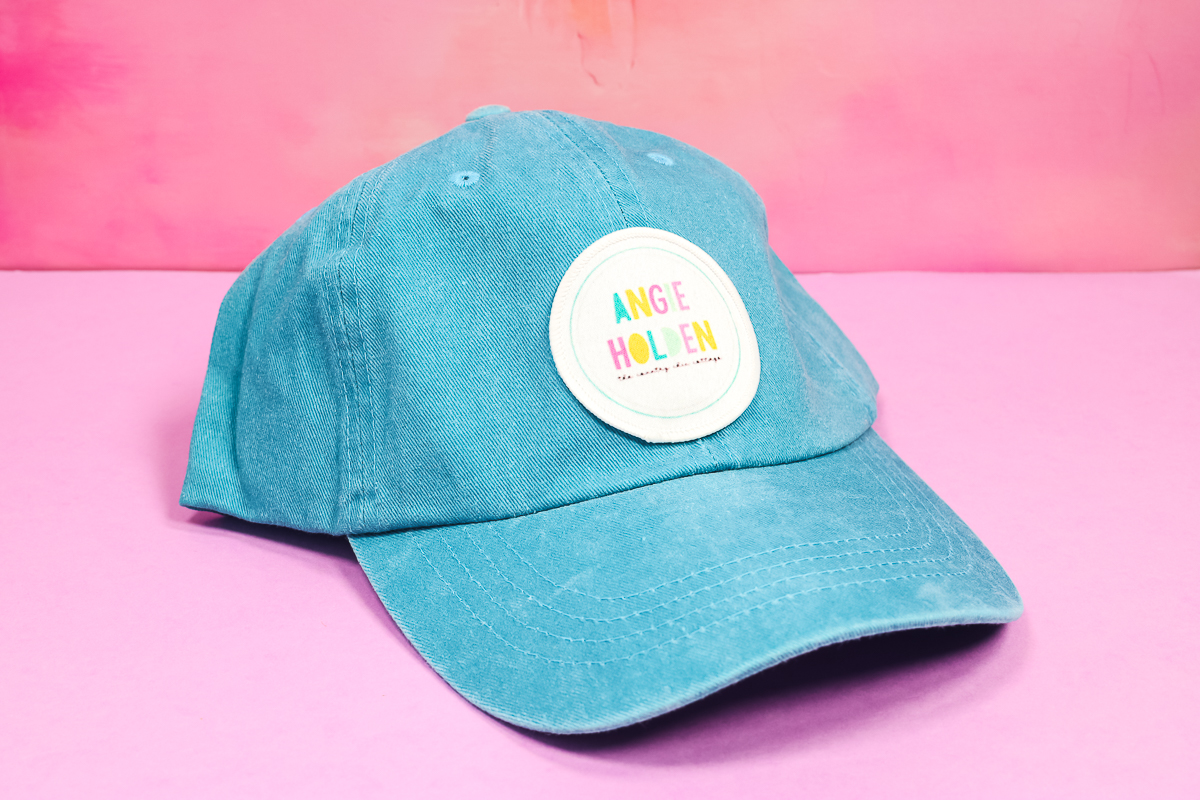
Afterwards removing the tape I noticed my chenille patches are a little flat. This is likely from the pressure of the Hat Press. Mine fluffed up really easily past just rubbing my finger over the acme of them. These turned out perfectly. They're stuck downwards actually well and my hat is set up to vesture!
Iron-on Embroidered Patches with Cricut Lid Press
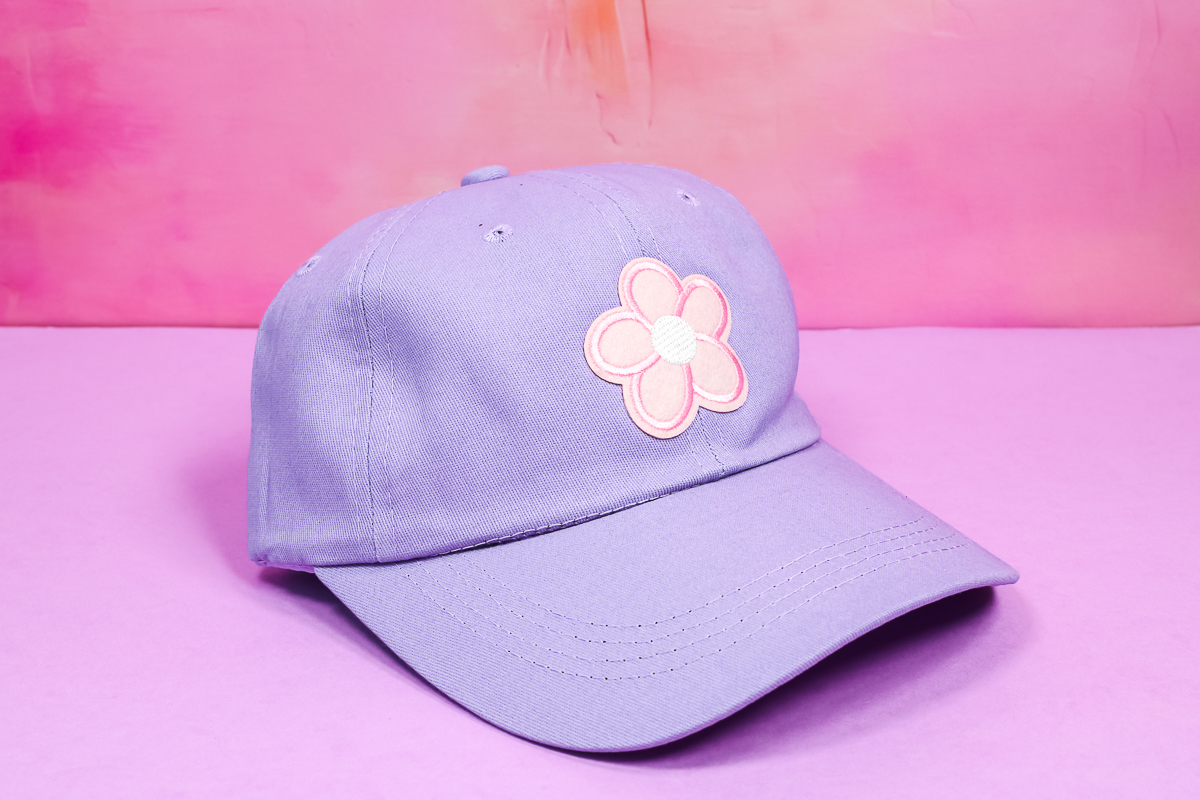
The process for applying an embroidered iron-on patch to a hat with the Cricut Hat Press is nigh exactly the same every bit adding the varsity letter patches. I didn't discover much of a departure but if your patch has more embroidery on information technology you may find that it is a little stiffer and may crave more than force per unit area and tape.
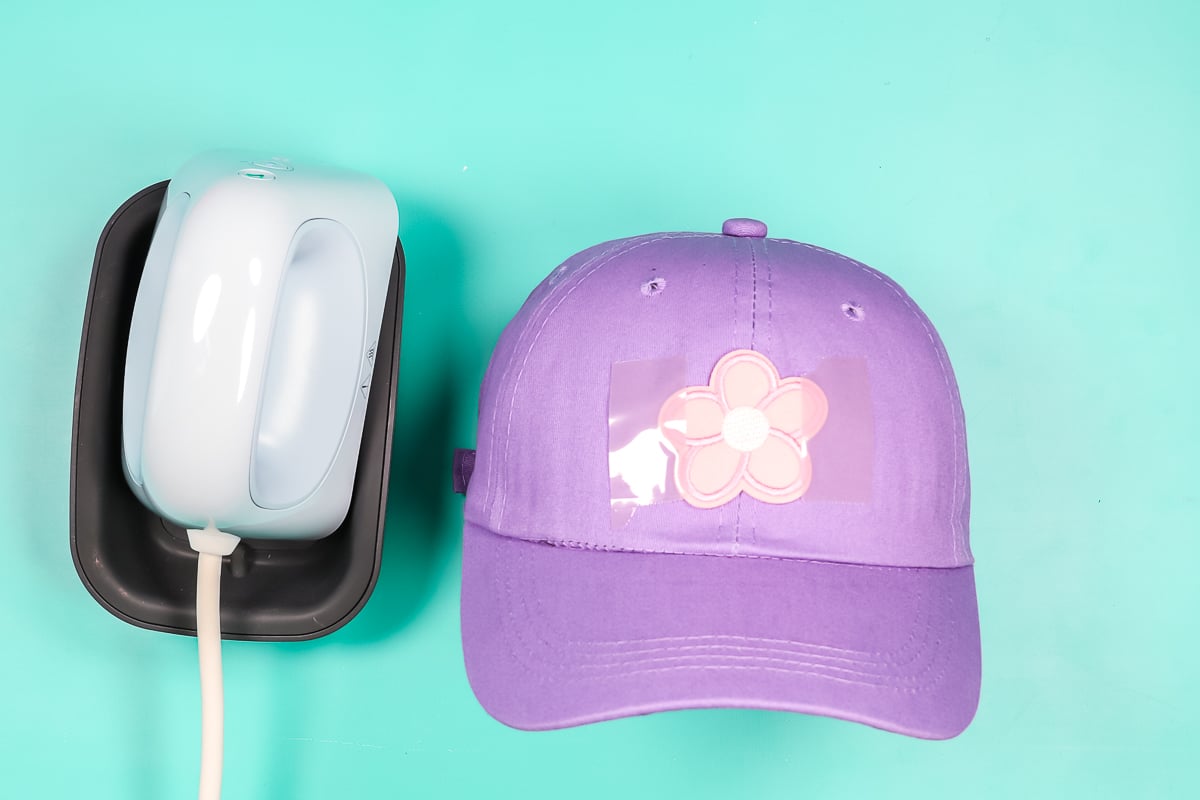
My embroidered patch also called for adding something to protect it from the rut press. I am using butcher newspaper, if you lot don't accept any you lot could also utilise a sparse material.
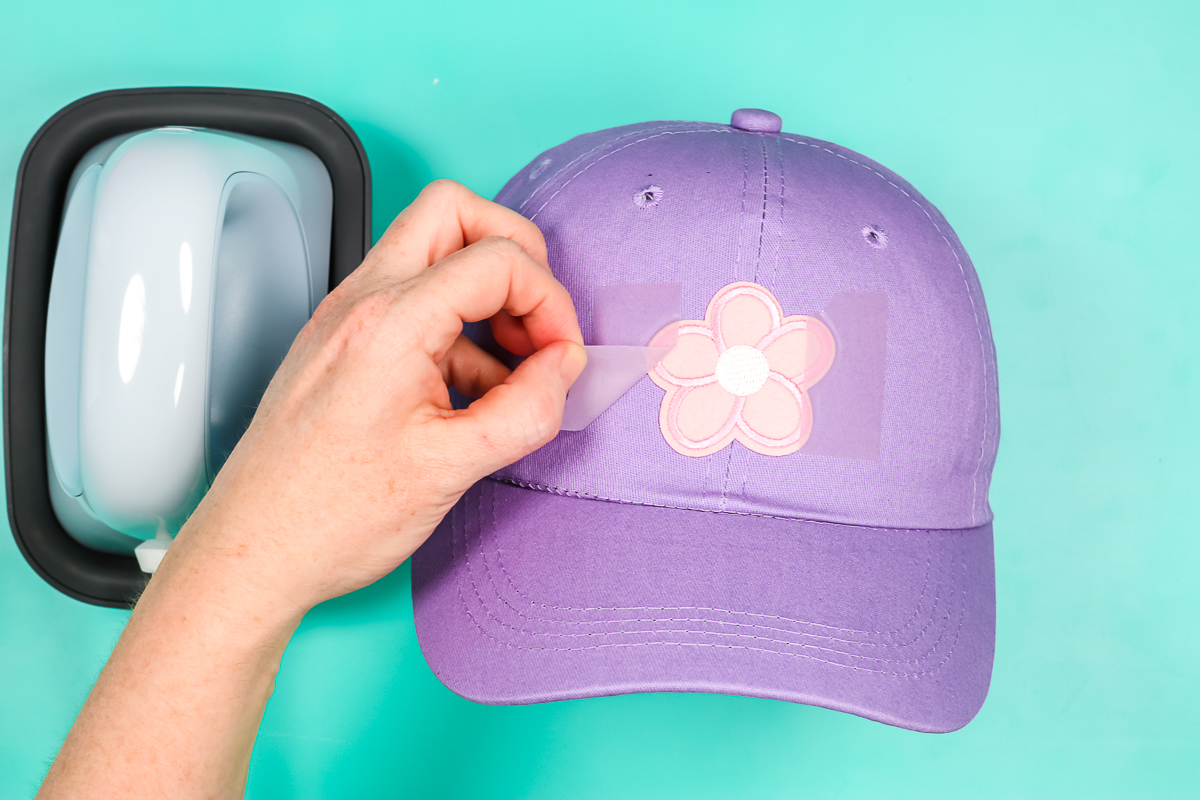
But like with the varsity letter patches, when you lot're done pressing remove the butcher paper and check to come across if information technology looks like it's pressed down well. If information technology is, allow the patch to completely cool before removing the estrus record.
Once you're certain the patch is completely cool, remove the heat tape and your chapeau is ready to clothing!
Sublimation Patches with the Cricut Hat Press
The procedure for adding sublimation patches with Cricut Hat Printing is a picayune longer than the other patches because we are really calculation the image to the patch earlier calculation the patch to the hat.
For more than information on creating sublimation images and printing them out check out my sublimation nuts guide here.
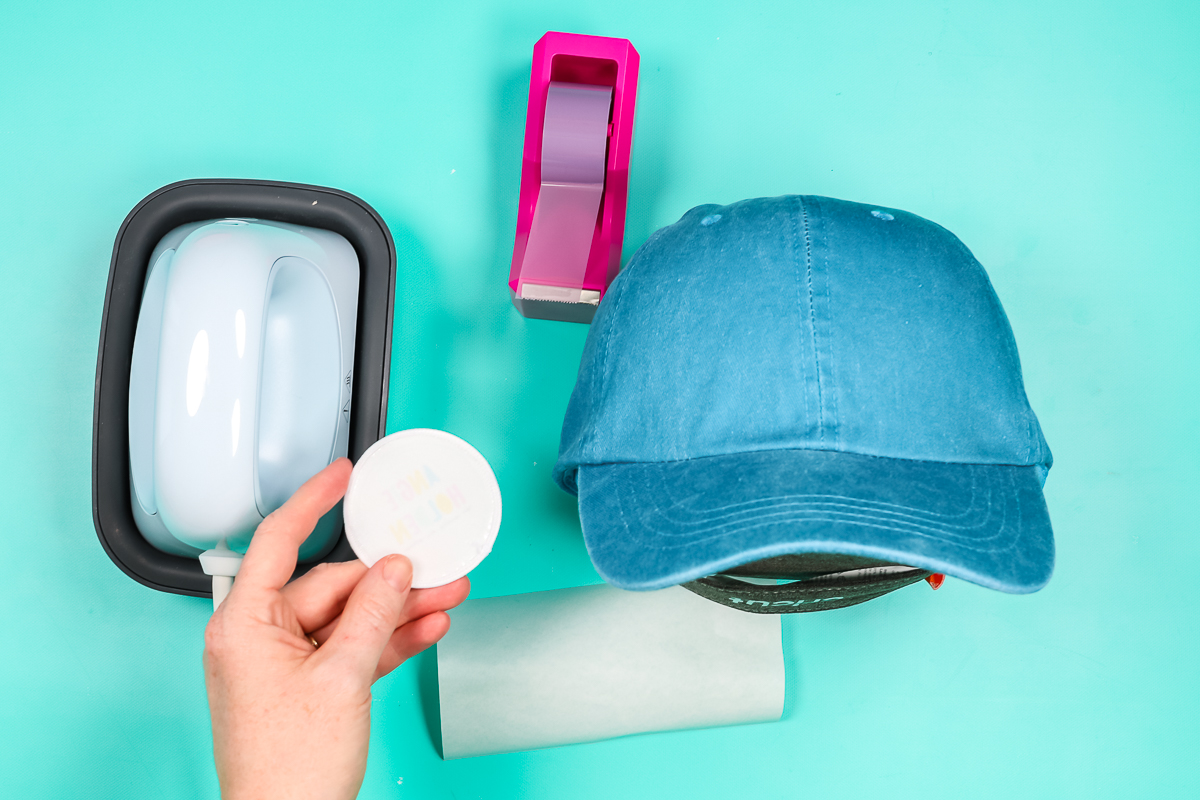
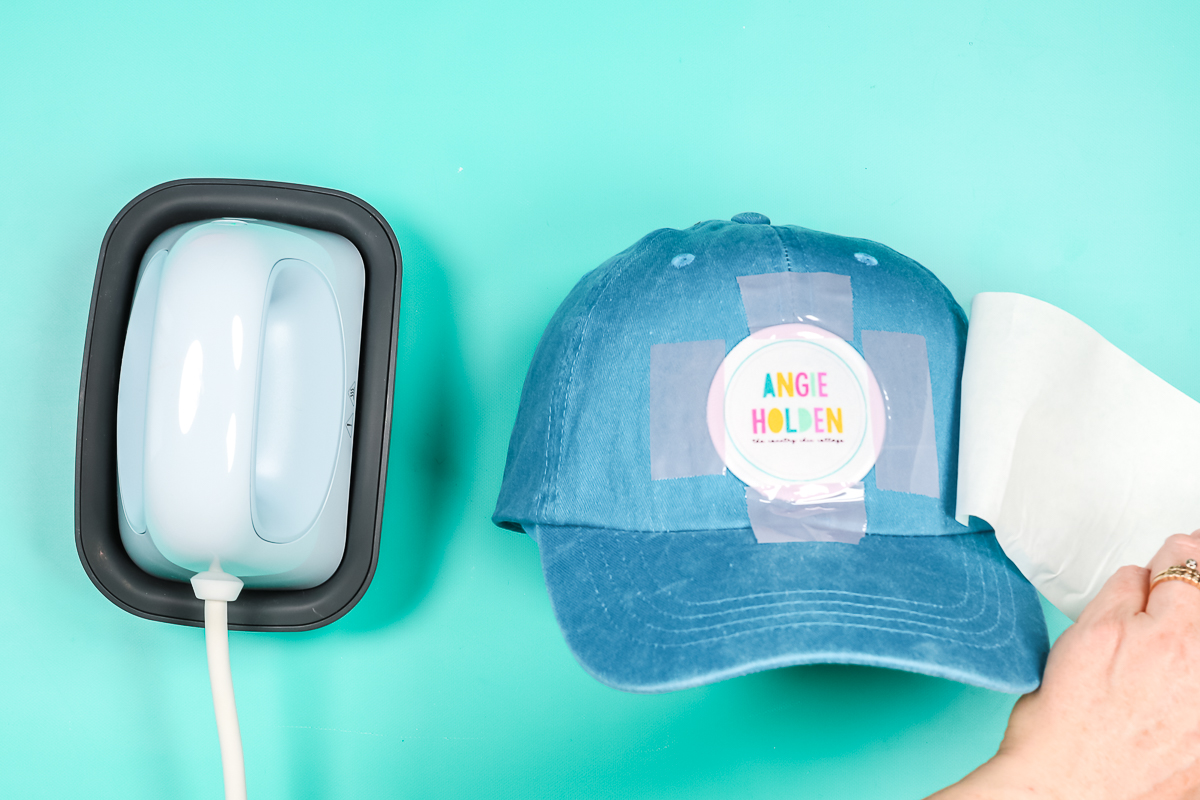
Starting time by cleaning the sublimation patch well with a lint roller. And then add together your sublimation print. My image fits the patch within the stitched expanse.
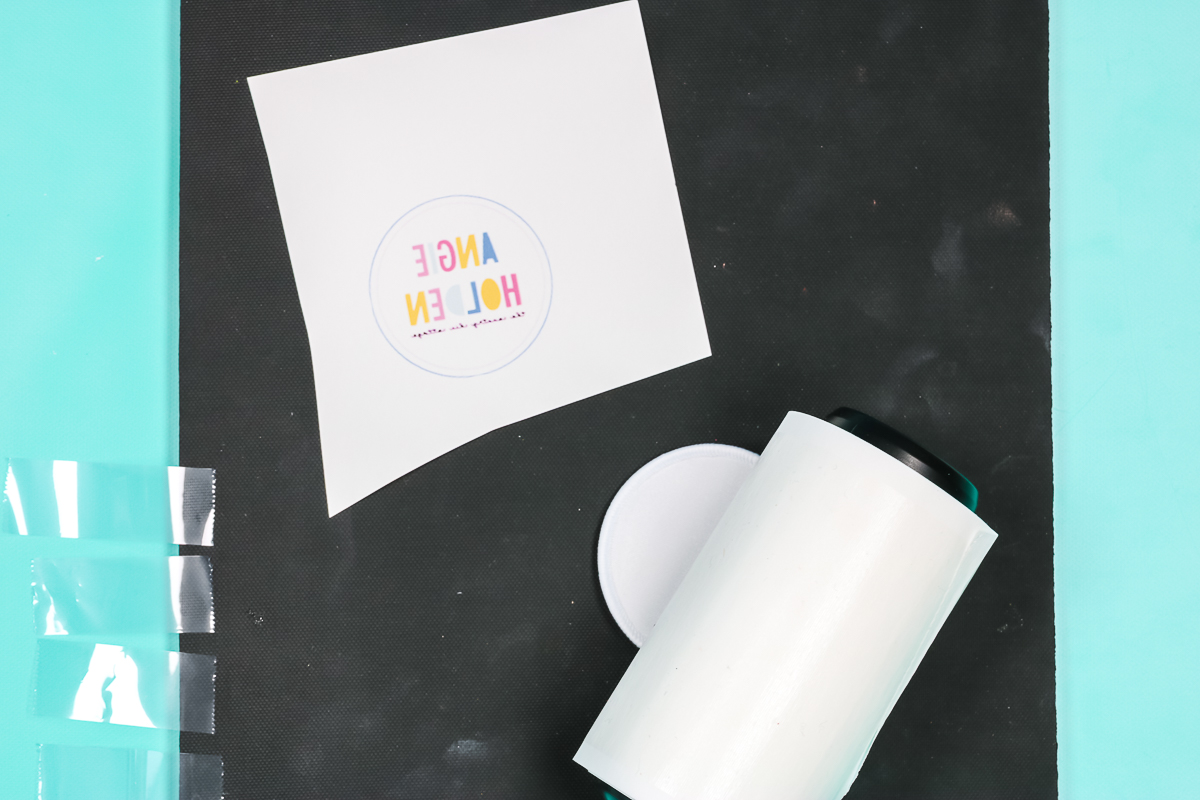
Your image can exist like mine and fit inside the stitched area or it can be larger than your patch to embrace the entire patch. You lot'll want to hold your image and patch to the lite so yous tin can make sure information technology's lined up exactly where you desire it. Once you accept it right where y'all desire it, use heat record to attach the image to the patch.
NOTE: The dorsum of the sublimation patch has a paper backing. This protects the atomic number 26-on adhesive during the sublimation process. I recommend doing your best to not stick the tape to that equally it can tear it.

Sublimation on Patches
Now that nosotros have the paradigm exactly where we want it on the patch we can press it. I am using my Cricut AutoPress merely you can utilise whatsoever heat press that will give you lot at least medium pressure. Considering we're working with a sublimation impress nosotros need to make sure to cover the tiptop and bottom with a protective sheet. This will foreclose any ink from passing to the press above and mat below.
I am going to press my sublimation image to my sublimation patch for fifty seconds at 380 degrees with the sublimation side up.
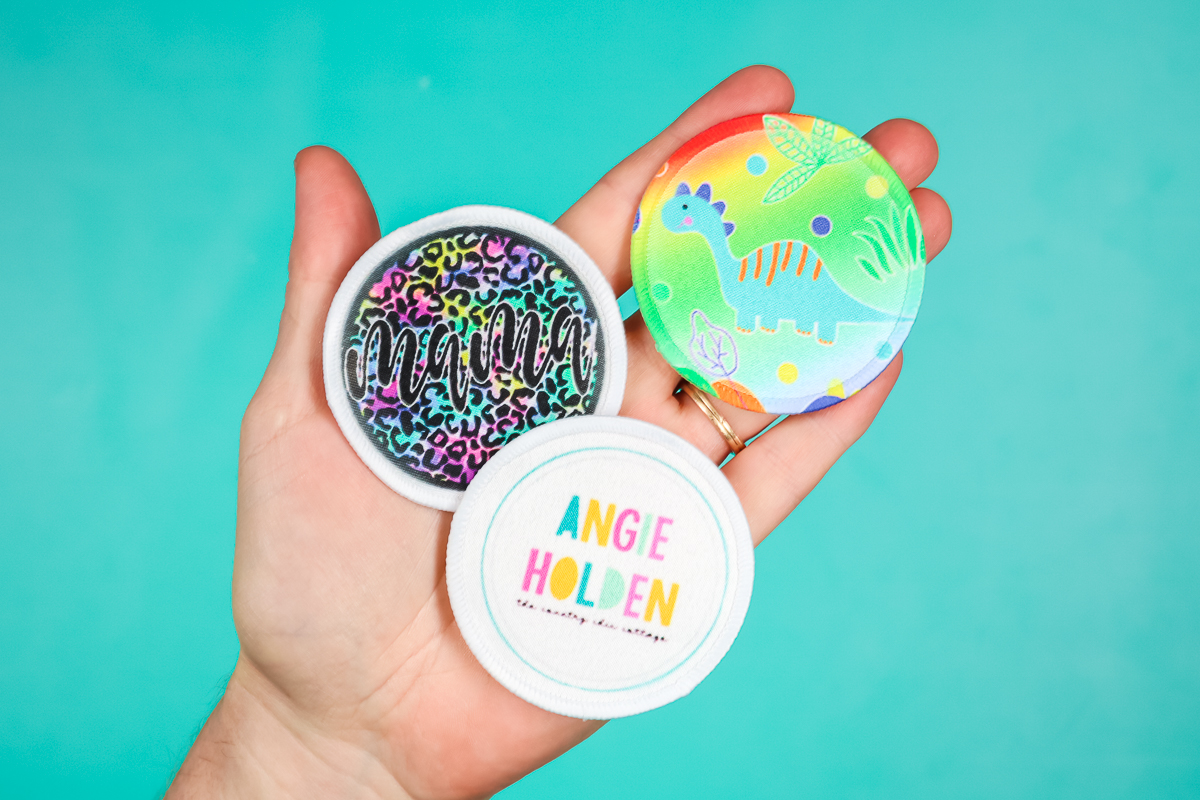
Once the patch has been pressed, nosotros can remove information technology from the AutoPress. Nosotros'll remove the protective newspaper and sublimation print. Await at how great it turned out!

As I mentioned above I made my image so it would fit within the stitching on the sublimation patch. You can add images to these patches by going right up to the stitching or even all the mode over the stitching. The whole patch can exist sublimated so information technology will fifty-fifty show up on the stitching itself.
Adding Sublimation Patches to Hats
The process of calculation the sublimation patch to hats with the Cricut Hat Printing is very like to the other iron-on patches. The chief differences are fourth dimension and temp and removing that protective paper.
On the back of the sublimation patch is a paper protective piece. You demand to remove this paper to expose the iron-on adhesive. Make certain y'all get all of it removed and then it sticks down everywhere. The adhesive is not sticky and so you don't need to worry about it sticking to annihilation until you apply heat.
Considering of the low heat and the short amount of time we're pressing, the sublimation image should not reactivate.
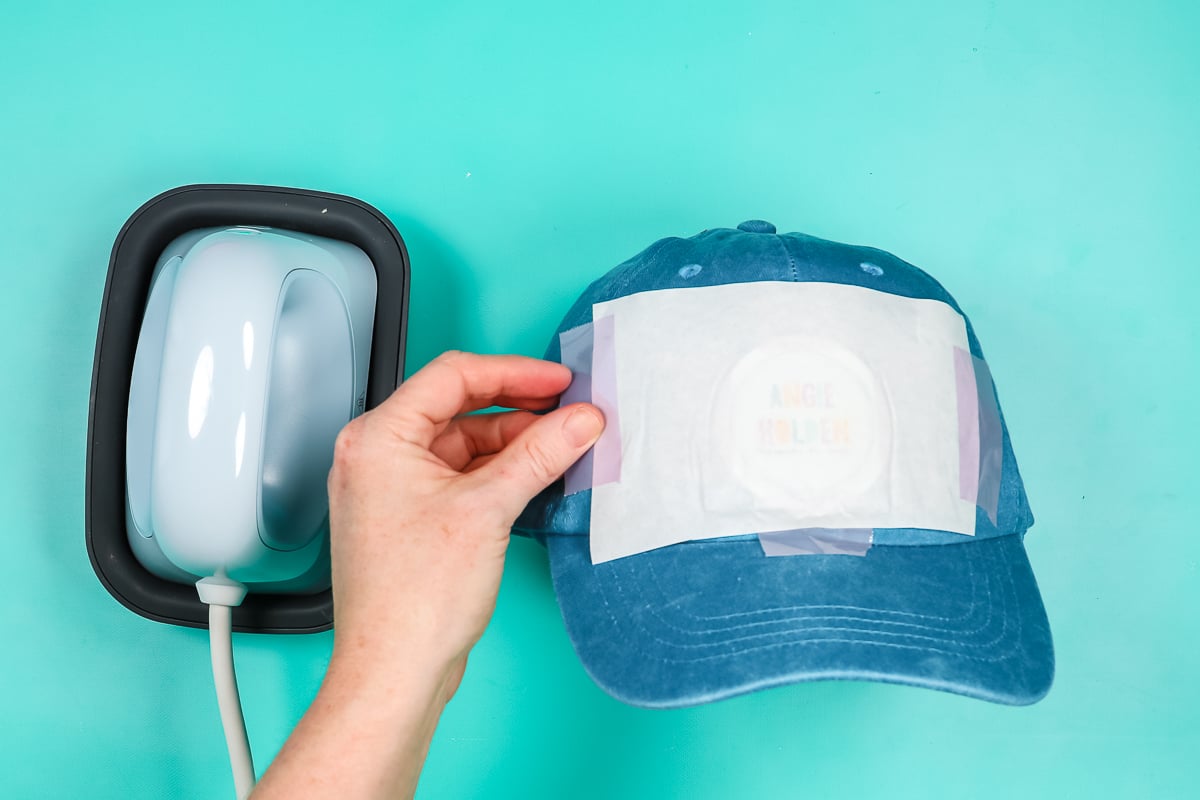
Add your sublimation patch to your hat where you lot want information technology and then tape it down with heat tape. All of the patches recommend using a protective sheet between the patch and the heat source to protect the patch. I am using butcher paper and am taping it downward with Cricut estrus tape.
I am pressing my sublimation patch for 15 seconds at 300 degrees. Because of the brusk time I am not going to move the press back and forth. Merely employ the printing to the patch and agree it in one identify with medium to firm pressure for the full 15 seconds.
The butcher newspaper will protect the Hat Press if the sublimation ink does reactivate.
Only like the other patch projects I am going to remove the butcher newspaper and bank check to make sure information technology looks like the patch is stuck down. Wait for the patch to completely cool before removing any of the record. In one case everything has cooled, remove the rut tape and your hat is finished!
Last Thoughts on Applying Patches with the Cricut Hat Press
I am And so happy with how the hat press worked with applying patches. With the chapeau form and the curve of the Hat Press, I feel the patches press really well and it'southward very like shooting fish in a barrel to take a customized chapeau even without a Cricut machine. You should actually requite applying patches with the Cricut Hat Press a attempt!
At present all that's left is for you to find the patches you want to add to your hats. If you take the Cricut Hat Press, I encourage yous to give this project a try. I call up you'll really like adding patches with the Cricut Lid Press. It gives a unlike look to your hats so that all your hats don't look the same!
Source: https://www.thecountrychiccottage.net/patches-with-the-cricut-hat-press/
0 Response to "How To Make Iron On Patches With Cricut"
Post a Comment